Setting up Timekeeper Locations
If employees will be using JM for Timekeeping, they have two options: JM Connect, or the Call-In Method.
Both Methods require some additional setup in the account by a Manager with Web Access.
Location Settings to Complete Prior to Launching Timekeeping:
Import or Set up All Locations
If you still need to set up locations for your employees to work, follow these instructions to create a location, and come back to this page to finish the Timekeeper Location setup.
Timezones
The timezones must be individually set for each location before launching timekeeping. The timezone affects the late in/early out alerts set by the schedules. If alerts are coming in at the wrong time, check the timezone for the location.
To edit a location's timezone:
- Go to Customers > Manage locations
- Click the edit pencil on the location you wish to edit
- Enter the timezone this location is located in. This will ensure time punches are recorded at the correct time at the location.
- Click Save.
Latitude and Longitude and GeoFences
The latitude and longitude determine the exact GPS coordinates of the location.
When an address is entered into the location's Geographic Information box, it tells the system that this is where employees need to be in order for the location to appear on the Clock in screen.
The GeoFence determines what area on the map will be preapproved for employees to clock in from. Time punches will come in as preapproved if the employee was inside the drawn GeoFence.
- Go to Customers > Manage locations
- Click the edit pencil on the location you wish to edit.
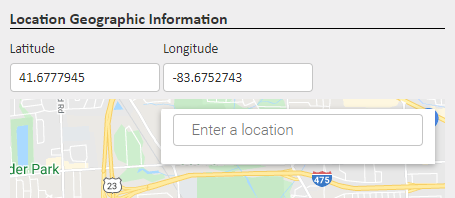
- Scroll to the bottom and find the Location Geographic Information section.
- Enter the location's address in the floating box on the map and Google Maps will automatically enter the latitude and longitude for you.
- Click Save at the top of the page.
- After saving, click on the GeoFence sub-tab.
- Draw the GeoFence around the building and the parking lot or any acceptable areas for the employees who work at this location to clock in from.
- Employees need to be inside the GeoFence when they clock in or out, or their time punches will come into JM as Pending and will be subject to approval by a Manager
- Click here to learn more about setting up custom GeoFences.
- Locate the Blue pin on the map. Is it in the right place? Is it on the road? Is it inside your drawn GeoFence?
- Google Maps adds the Blue pin based on the address of the location, but often times will put the pin closer to the main road rather than on top of the building where employees will be clocking in or out from.
- The Blue pin MUST be inside the drawn GeoFence, and MUST be on the correct building employees are trying to clock in to, or problems clocking in or out could potentially arise.
- Click here if your Blue pin is NOT in the correct spot.
Call-in Clock-in Settings
Call-in clock-in can be used for employees with no smart device, or a device that is outdated and does not support the functions of JM Connect.
Location Timekeeper Phone Numbers
The phone number entered in to the Timekeeper Phone number section of the location MUST belong to the phone employees are going to use to clock in or out.
Unique Timekeeper Phone Numbers for Each Location
If each location has its own unique phone number that shows up on the Caller ID when dialing out from the location's on-site phone, setup is very simple.
- Go to Customers > Manage locations
- Click the edit pencil on the location you wish to edit the phone number for
- Under General Information, locate the Timekeeper Phone No. box and enter the location's phone number
- Click Save
- Use the Customer and Location dropdowns to navigate to the next location and repeat step 3 until each location has a Timekeeper Phone Number.
Multiple Timekeeper Phone Numbers for One Location
Does a location have multiple phone numbers that belong to it? Is there more than one number that could show up on the Caller ID depending on which phone the employee picks up to call in?
- Go to Customers > Manage locations
- Click the edit pencil on the location you wish to edit the phone number for
- Under General Information, Check the box for Multiple Timekeeper Phone No.

- Click the Save button.
- You should now see Timekeeper Phone in the horizontal list of black oval sub-tabs. This is where you will enter additional phone numbers associated with the location.
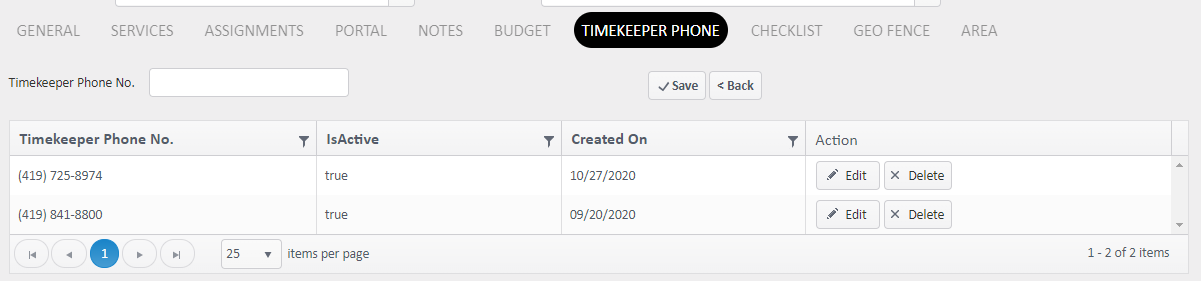
- This allows time punches to be preapproved for this location if the call-in number at the time of the clock in or out matches at least one of the numbers listed.
- Type another number into the Timekeeper Phone No. box and click Save. Repeat as necessary.
Multiple Locations with the Same Timekeeper Phone Numbers
When multiple locations in your account have the same Timekeeper Phone number (the same number that would show up on the Caller ID if an outbound call was made there), the call-in system needs a different way to identify which location the employee is trying to clock in to or out of.
You will need to incorporate Building Codes within your location settings so the call-in system can distinguish which location to assign the time punch to when the number being used to clock in or out matches up with multiple locations.
When calling in to clock in or out, the prompt will automatically identify if the number used to dial in is assigned to multiple locations in your account. The prompt will then ask the employee for the building code to determine which location the employee is at.
To Turn ON Building Codes
- Scroll over the Gear icon and select Manage Account
- Select the Timekeeper sub-tab
- Turn the Call-in Building Code toggle switch to ON (Blue)

To Add Building Codes to Locations
Building Codes are created by you and can be whatever numbering system makes sense to you. You could use the location's address numbers; a simple 01, 02, 03; or any other numbering convention of your choice. Maybe you already have a numbering system you use to identify your customers! This is up to you and can be whatever you choose.
- Go to Customers > Manage Locations
- Select the edit pencil for a location
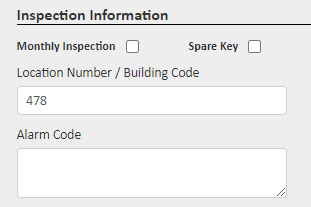
- In the Inspection Information section, find the Location Number/Building Code box and enter the building code that will be used to identify this location
- Click Save at the top
- Use the Customer and Location dropdowns to navigate to the next location and repeat steps 2 and 3 until each location has a building code.
Multiple Employees Using the Call-In Method at the Same Location at the Same Time
Do you have multiple employees clocking in with this method together at a location? Let us know! We can enable a special "pass the phone" option so each user does not have to re-dial the call-in phone number. Send an email to support@janitorialmanager.com or click the red Help button in the bottom right corner of this article with your request.
Personal Voice Messages Specific to a Location
The advanced call-in timekeeping system allows account admins to add personal voice messages with important announcements or reminders of tasks to be completed at the location that will play after the employee clocks in using the call-in prompt.
Click here to set up Personal Voice Messages for your Employees using the call-in method.
For more information, or to send in a request to the Janitorial Manager support department, use the red 'Help' button in the bottom right corner of any Help Desk article.
Comments
0 comments
Please sign in to leave a comment.