QR Codes with Work Template Scan
Work Templates are used to define employee tasks within a room, section, or project at a facility. When attached to an Area (QR Code), Work Templates appear as checklists for employees on JM Connect.
Saving an Area Template as a Work Template
Adding Work Templates to QR Codes
ISSA Standards vs. Actual Labor Time
Scheduling Areas with Work Templates
Work Template Scan on JM Connect
Creating Work Templates
- From the portal site, navigate to Tools > Work Loading Calculator 2.0.
- Select the Work Templates tab.
- Select + New Work Template.
- Select the Edit Pencil for the new template and rename it. Work Templates work best with specific naming (Restroom with 2 Stalls, Office with 10 Cubicles, Office 10A, etc.).
- Select the arrow on the lefthand side to view more information. Select the Room Type, and optionally, add a description.
- Select the arrow on the lefthand side for Associated Activities to expand the menu, then select + Add Associated Activities.
- In the Select Activity popup, select the checkboxes for the Activities that are included in the area. Select Save to add the Activities to the Work Template.

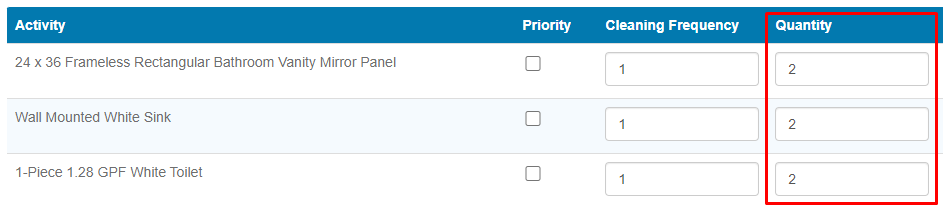
- Add information for Quantity, Cleaning Frequencies, and Frequency Type.
- For Quantity, add the number of fixtures (Activities). As an example, if an area has 3 toilets, the quantity for the Activity would be 3.
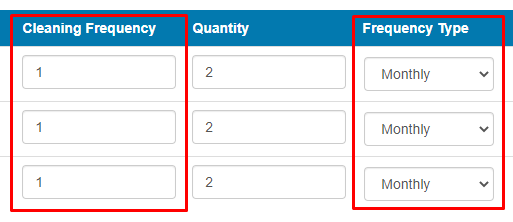
- For Cleaning Frequency, select 1.
- For Frequency Type, select Monthly.
- Select Save to update the Work Template.
Saving an Area Template as a Work Template
Area Templates in the Work Loading Calculator can be duplicated as Work Templates.
- From within the Work Loading Calculator, select the Area Templates tab.
- Select the checkbox on the righthand side for the desired template.
- To select all Area Templates, select the Select All Area Templates checkbox.

- To select all Area Templates, select the Select All Area Templates checkbox.
- Towards the top of the page, select Save as Work Template.

- The template will be saved to the Work Templates tab as a copy.
Best Practices
- Create Work Templates as specific as possible to an area. As an example, if a restroom at your location has unique fixtures, create a separate Work Template to be used for that area. This ensures that the full scope of work for that area will be accounted for.
- When creating Work Templates, ensure that the number of fixtures reflects the actual amount in the intended area. As an example, if a restroom has two mirrors, two sinks, and two toilets, update the quantities accordingly.
- Work Templates should always have Monthly as the Frequency Type, and 1 as the Cleaning Frequency. In the calculator, this is the same as a one-time clean. Work Templates are attached to Areas (QR Codes), so how often the Area is scheduled will determine its actual frequency.
Adding Work Templates to QR Codes
- From the desktop site, navigate to Customers > Manage Locations.
- Select the Edit Pencil in the Actions column for the desired location.
- Select the Area tab.
- Create a new area or select the Edit Pencil for an existing area.
- Select the Work Template subtab.
- Add the required information. Minutes will be generated after the information has been added.
- Title - The name of the Area's Work Template.
- Area (Sq. Ft.) - The size of the area in square feet.
- Room Type - The room type that was selected for the intended Work Template in the Work Loading Calculator. This needs to be selected before the Work Template dropdown.
- Work Template - The Work Template from the Work Loading Calculator.

- Select Save to add the Work Template to the Area.
ISSA Standards vs. Actual Labor Time
Adding Work Templates to an Area generates an estimated cleaning time based on ISSA standards. This time can be used with our Cleaning Times vs. Area Estimation report to view how your company's actual labor times compare to ISSA times.
- After adding a Work Template to an Area, select the Set as Estimated Area Time button in the Actions column.
- To reverse the action, select Remove Estimated Area Time.
- On the Client Area subtab, the Work Template's time will be added as the Estimated Area Time.

Scheduling Areas with Work Templates
- Navigate to Customers > Manage Schedule.
- From the Schedule tab, select Add Schedule.

- To add Areas to a recurring schedule, select the Recurring tab.
- Add the required information on the General and Advanced tabs.
- Select the Area tab, then select Work Template Scan as the Scan Type.

- Select the checkboxes for the areas that should be cleaned during the shift. The area's square feet and estimated cleaning time will be visible after selection.

- Publish the schedule for it to be visible to the employee, or save the schedule as a Draft to publish at a late time.
Work Template Scan on JM Connect
- From JM Connect, select the Clock In/Out Icon.
- Clock into a location.
- Select the Areas tab at the bottom of the Time Clock screen.
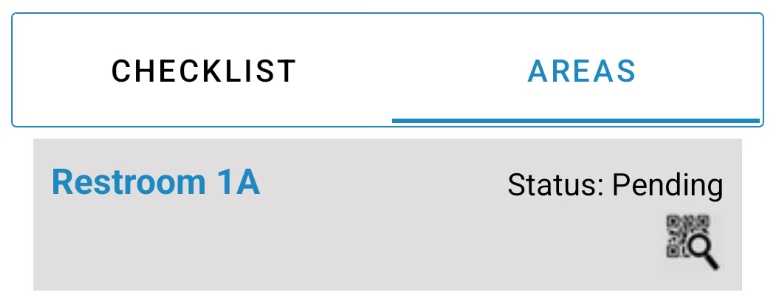
- If the Areas tab is not visible, Areas are not scheduled for that shift.
- Areas that have not been completed will appear as Pending.
- Select the QR Code icon for the Area that you'd like to scan. The camera will open on your device.
- Scan the Area's QR Code. The tasks associated with that area will appear.
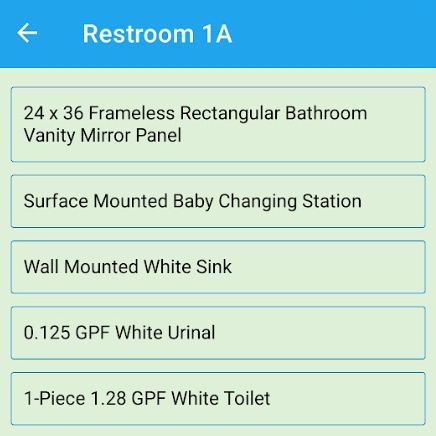
- Select the Start button on the bottom of the screen to begin completing the checklist, then select Complete or Skip per task.
- Select the Complete button at the bottom of the screen to finish the Area.
- Back on the Time Clock screen, the Area's status will update to Completed.
For more information, or to send in a request to the Janitorial Manager support department, use the red 'Help' button in the bottom right corner of any Help Desk article.
Comments
0 comments
Please sign in to leave a comment.